Breaking Azure with Hyper-V
Imagine not being able to remote into your Azure VM? No, imagine not being able to remote into a production instance of your Azure VM!? Well, that’s exactly what happened and I’ll show you how I got into this predicament and how I got out of it.
So I was exploring Nested Virtualization for Linux distributions within Azure, the usual solutions that I would use on my host machine would be VMWare or Oracle Virtual Box. Automatically VMWare was out of the picture because of Azure and its Hyper-V’s architecture and after Windows 10 1909 update, Oracle Virtual Box was ultimately…unusable, performance-wise it was beyond slow. Market Place was an option but the Image in question was not available for my region.
Why not give Hyper-V a shot?
I always shy away from Hyper-V, why? At some point, it breaks my host machine networking settings about 70% of the time. Where I would usually run a netsh int ip reset along with ipconfig /release andipconfig /renew to reset/refresh my network settings and be back in action, I was more hesitant with Cloud instances.
Okay so let’s recreate what happened, follow along with me or if you’d rather jump straight into the action then click here. Now! Let’s get an azure virtual machine environment up and running. If you don’t have one, you can sign up for a free account and get $200 free credits(that’s what I did ) and follow along from there. Strong warning though! Monitor your credit card purchases once that $200 credit is up. An affiliate link would have been pretty great right now but hey, beggars can’t be choosers. Okay, let’s get into it.
Create your Virtual Machine
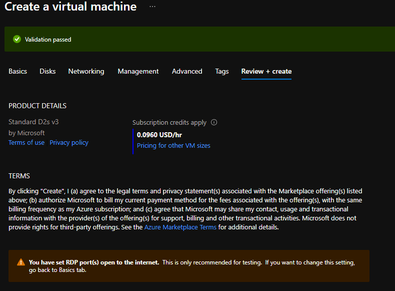
Once you’re done signing up, let’s now navigate to our Azure Portal and create our Virtual Machine. We could use PowerShell for this but we’ll keep it GUI friendly for new users. We will be creating a Windows 10 VM with the below settings:

Disclaimer: It is already shown in the screenshot but I will emphasize once more, this is for testing purposes. Your RDP port should never be open to the public internet.
Please to also take note of the Size in the above screenshot, it is very important as this is one of the sizes that support Nested Virtualization in Azure. More information on this is found here.
You can leave the disk header as default and configure your public IP and subnet as you see fit as shown below:

Now let’s leave all the other tabs as the default and move on to “Review + Create” to get our VM up and running:
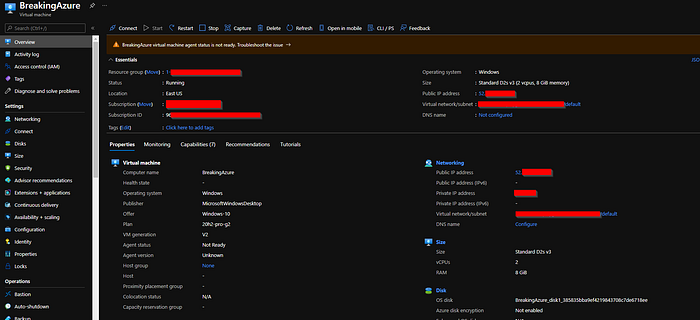
Now let’s go to our VM blade:
Remoting in!
Take note of your public IP, bring up your RDP client, and remote into your newly created Virtual Machine.
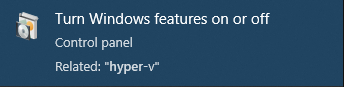
Let’s enable Hyper-V before we begin, in your search bar, type in “Hyper” and it will come up:
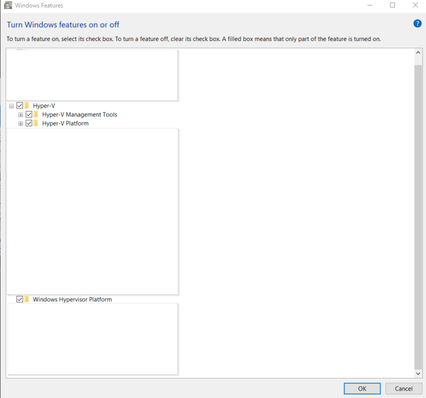
You should now be seeing a prompt, check the necessary boxes, click “OK” and then wait on the changes to take effect. Once that is done you may be required to restart.
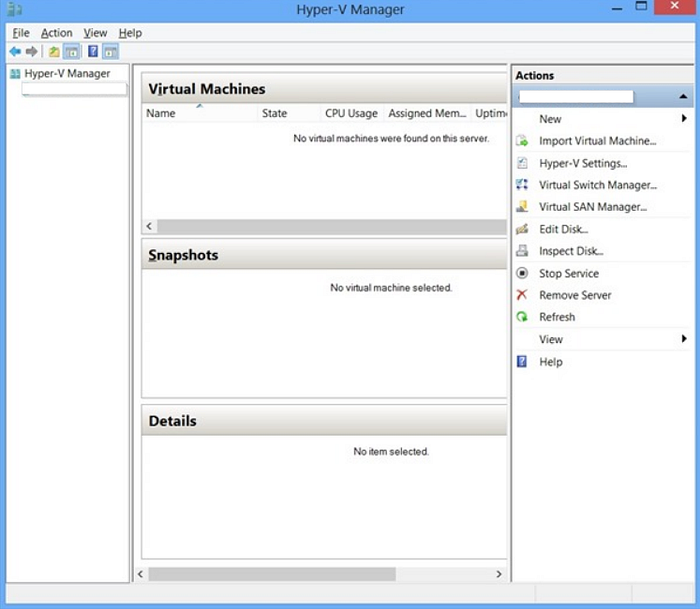
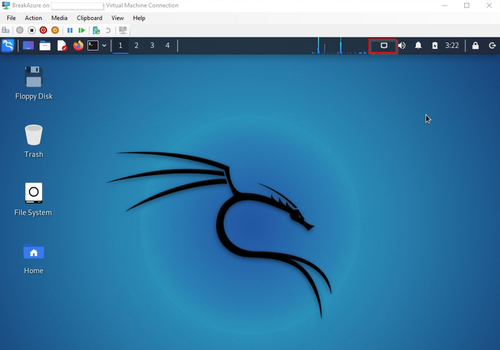
Hyper-V Manager
Let’s open Hyper-V Manager, you should be seeing something similar like below:
First things first, download an ISO image of an operating system. In this case, I will be using a Debian Linux Distribution, Kali in this case. You can download your own Kali ISO or use any ISO of your choice.
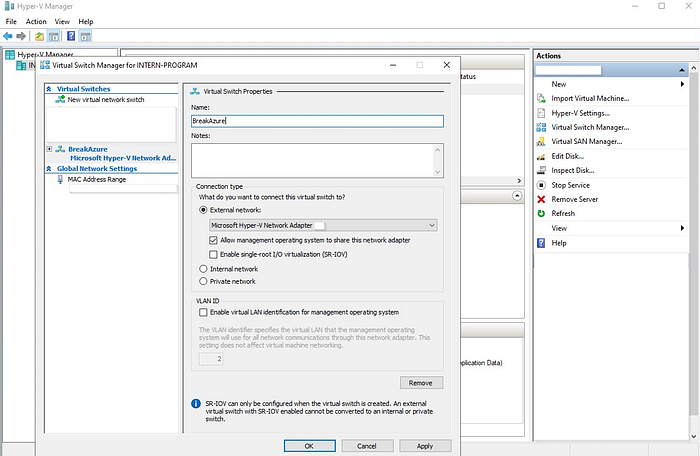
Okay so typically with our Hyper-V VM we first need to create a Virtual Switch that will attach to our ISO so we can have internet connectivity shared with the Guest OS from the Host OS. So let’s do that with the settings below:
Click on OK and you will get a prompt below, go ahead and click “Yes”:

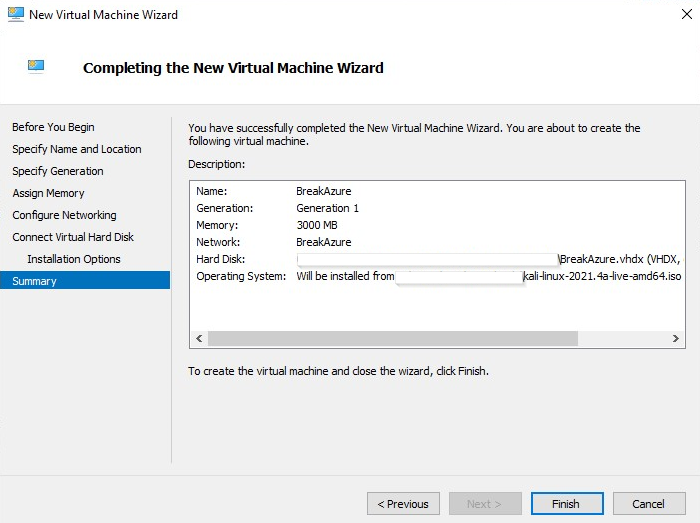
Let’s create that Virtual Machine within Hyper-V Manager. Click on “New” in the top right and select “Virtual Machine.” same. Once you reach the “Configure Networking” section, attach the switch we created before. Point to where your ISO is and after that everything remains the same.
The final look:
Start your Virtual Machine
Go ahead and start your machine until you’re on the desktop of the OS environment.
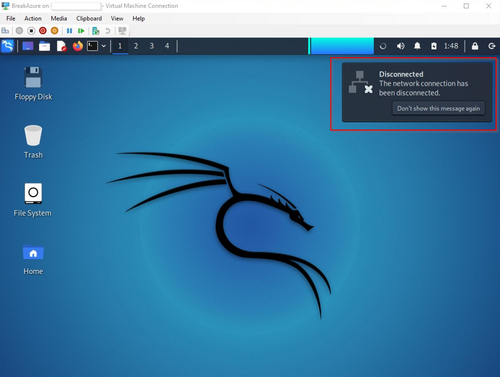
The first thought would be to check the network settings on your Guest OS, right? If you do that then that is normal. You’ll probably want to check your resolv.conf file next within your Kali distribution, right? dhcp, eth0, the works! All logical options but that was not the issue. If you are using a windows distribution you must be going through ipconfig /all , every trick in the book. Ultimately the problem is not with your Guest OS, now let’s go back to our Host OS.
Now we break things
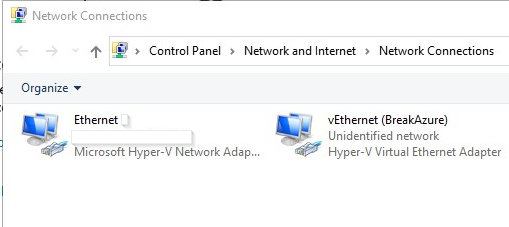
So now let’s look back at our network switch settings from earlier, use the screenshot from earlier as reference. Everything seems fine. Let’s go to Network Sharing on our Host OS Ethernet adapter.
Looking at the IPv4 settings it was doing what it was supposed to be doing.
Hmmmm…everything checked out but I said let me try something out of the ordinary. What if we link our Hyper-V network switch to our Host Ethernet Adapter? How? See below for reference:
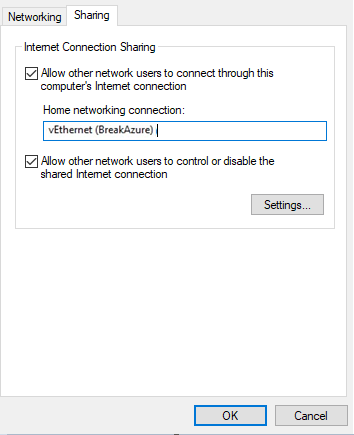
Okay seems good, so let’s click “OK” and go back to our VM……
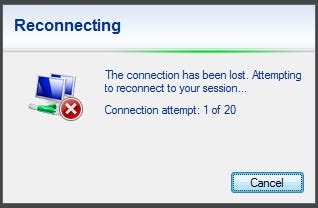
…What just happened? So I waited. Went to get some water…came back. It came off the screen so I tried reconnecting:
Contact “your network administrator.” I’m the Network Administrator…

Okay, maybe my internet connection dropped? Surely that’s the issue, right? I can connect and browse to other cloud instances just fine though.
So I am there for a bit…did I just break a production VM within Azure?

Keep Calm?
So let’s recap, what went wrong? We created an External Virtual Switch within Hyper-V Manager. After we created it we then navigated to Network and Internet Settings > Change Adapter Options opened our Ethernet adapter, clicked the sharing tab, then added our External Virtual Switch to the Ethernet Adapter. Essentially because of this change, it affected the ethernet adapter on the VM which ultimately prevented us from remoting to the VM.
As per Azure RDP Troubleshooting Steps, let’s run through their list to see if we can resolve this issue. First things first, let’s try resetting the RDP settings:

Needless to say, after one hour it didn’t move beyond this point:

So that wasn’t working.
Next up? Check the Network Security Group rules for any changes, still nothing.
Maybe if we reset the VM password? Yeah that didn’t work either.
Let’s redeploy the Virtual Machine! That will surely….NOT work.
I was out of options, one last thing came to mind. Reset the Network Interface Card(NIC) for the VM :-)
Yeah, that didn’t work.
This is bad
“Hey admin, I can’t get to this program, is the VM down?”
“Yeah, just an “update” running, I’ll let you know when to check back.”
So we can’t remote to our Azure VM, if we look at the Boot Diagnostics within Azure, we can see a snapshot so the VM is fine…in theory:
The solution started looking like I would have to delete the VM and restore it from a backup, but checking on things:

And the previous backups retention had expired.
Next steps
I ended up deleting the VM but kept the public IP associated with it, and any other resources associated with it(NSGs, etc). Rebuilt it from scratch with the contents that were on it before.
Was I gonna try Hyper-V Manager again? You bet I was!
The Fix
So this time around instead of the External Network Switch, I created an Internal Network Switch and linked it to our Host Ethernet Adapter.
So the VM is still up, now let’s go back into our Kali:
Okay so far so good, let’s not get excited. Our luck earlier wasn’t the best, let’s pull up a terminal and do a ping test:
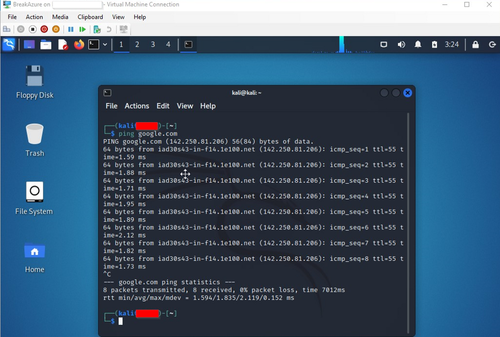
EUREKA!
Conclusion
I was on this for a while as there weren’t any resources to assist. All the resources were focused on a Windows Host OS vs that of a Cloud instance, specifically Azure. Ultimately I was left to just play around. So for anyone looking to deploy a Hyper-V-based Virtual Machine and there is no internet connection on the Guest OS, I just saved you some trouble.
Oh right, check your backup status job notifications religiously. :-)

Join FAUN: Website 💻|Podcast 🎙️|Twitter 🐦|Facebook 👥|Instagram 📷|Facebook Group 🗣️|Linkedin Group 💬| Slack 📱|Cloud Native News 📰|More.
If this post was helpful, please click the clap 👏 button below a few times to show your support for the author 👇